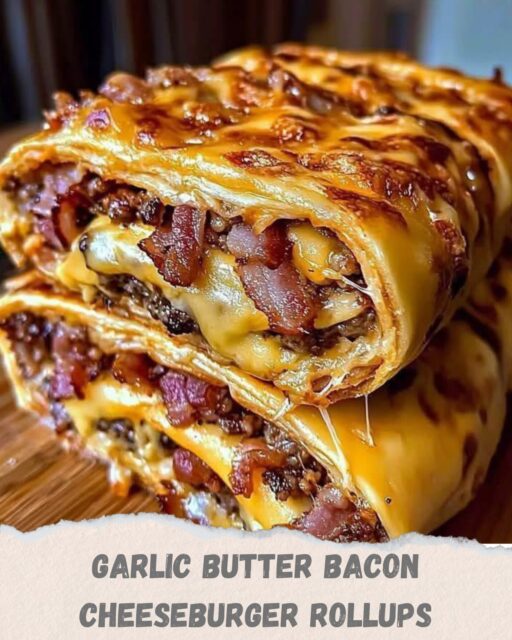
Each ingredient plays a key role in creating the classic cheeseburger taste packed inside a tender, flaky crust.
Dietary Substitutions to Customize Your Garlic Butter Bacon Cheeseburger Rollups
Want to adjust the Garlic Butter Bacon Cheeseburger Rollups to meet specific dietary needs? Here are some simple substitutions:
- Gluten-Free: Use gluten-free refrigerated dough, available at most supermarkets.
- Low-Calorie: Substitute ground turkey or chicken for ground beef, and use reduced-fat cheese.
- Vegetarian: Swap out the beef and bacon for plant-based crumbles and vegan bacon alternatives.
- Dairy-Free: Choose dairy-free cheese and use vegan butter for brushing.
- Keto-Friendly: Instead of pizza dough, use a low-carb dough recipe (like fathead dough).
These tweaks make it easy to enjoy Garlic Butter Bacon Cheeseburger Rollups regardless of dietary restrictions!
How to Prepare the Perfect Garlic Butter Bacon Cheeseburger Rollups: Step-by-Step Guide
Let’s walk through the simple steps to create these delicious, cheesy rollups!
First Step: Prepare the Ground Beef Mixture
Heat a skillet over medium heat. Add the ground beef, breaking it up with a spatula as it cooks. Season with salt and pepper. Cook until browned, then drain any excess grease. Stir in the crumbled bacon, mix well, and set aside to cool slightly.
Second Step: Roll Out the Dough
While the beef mixture is cooling, roll out your refrigerated pizza dough on a lightly floured surface. Aim for a large rectangle about ¼ inch thick to make rolling easier.
Third Step: Add the Fillings
Evenly spread the beef and bacon mixture across the dough, leaving about a 1-inch border along the edges. Sprinkle the shredded cheddar cheese generously over the top, followed by the diced pickles.
Fourth Step: Roll and Slice
Starting from the long edge, carefully roll the dough into a tight log. Pinch the seam to seal. Using a sharp knife, slice the log into 1-inch pieces.
Fifth Step: Prepare for Baking
Place each roll-up cut side down on a baking sheet lined with parchment paper. Make sure there’s a little space between each roll-up to allow for expansion while baking.
Sixth Step: Make the Garlic Butter
In a small bowl, combine the melted butter and minced garlic. Brush this flavorful mixture over the tops of each roll-up for a golden, buttery finish.
Seventh Step: Bake to Perfection
Bake in the preheated oven at 375°F (190°C) for 15-18 minutes, or until the rollups are golden brown and the cheese is bubbling.
Eighth Step: Garnish and Serve
Sprinkle chopped fresh parsley over the rollups once they’re out of the oven. Serve warm with ketchup and mustard for dipping.
Following these simple steps ensures your Garlic Butter Bacon Cheeseburger Rollups come out perfect every time!
Mastering Garlic Butter Bacon Cheeseburger Rollups: Advanced Tips and Variations
Want to take your Garlic Butter Bacon Cheeseburger Rollups to the next level? Try these expert tips and creative twists:
- Spicy Kick: Add diced jalapeños or a dash of hot sauce to the beef mixture for a little heat.
- Double Cheese: Mix mozzarella with cheddar for extra gooey goodness.
- Different Proteins: Swap beef for ground chicken, turkey, or even a plant-based alternative for a new flavor profile.
- Sweet and Savory: Drizzle a little barbecue sauce inside before rolling for a sweet-smoky twist.
- Breakfast Version: Replace beef with scrambled eggs and breakfast sausage for a morning-friendly option.
Experimenting with fillings and flavors can make this recipe endlessly customizable and exciting!
How to Store Garlic Butter Bacon Cheeseburger Rollups: Best Practices
If you have leftovers (unlikely but possible!), here’s how to store Garlic Butter Bacon Cheeseburger Rollups:
- Refrigerate: Place cooled rollups in an airtight container. They will keep in the fridge for up to 4 days.
- Freeze: Arrange rollups in a single layer on a baking sheet to flash-freeze. Once solid, transfer to a freezer-safe bag or container for up to 2 months.
- Reheat: To reheat, place rollups in a 350°F (175°C) oven for 10 minutes or microwave for 1-2 minutes until warmed through.
Proper storage ensures that your delicious rollups taste just as amazing later as they did fresh from the oven!
Nutritional Value of Garlic Butter Bacon Cheeseburger Rollups
Here’s a nutritional breakdown per serving (based on 8 servings):
- Calories: 280 kcal
- Fat: 18g
- Saturated Fat: 8g
- Cholesterol: 55mg
- Sodium: 540mg
- Carbohydrates: 14g
- Fiber: 1g
- Sugar: 2g
- Protein: 16g
Garlic Butter Bacon Cheeseburger Rollups are rich in protein, providing a satisfying and energizing bite. You can further adjust the nutritional content by choosing lower-fat or plant-based ingredients as needed!
FAQs: Frequently Asked Questions About Garlic Butter Bacon Cheeseburger Rollups
Can I make Garlic Butter Bacon Cheeseburger Rollups ahead of time?
Absolutely! Prepare the rollups up to the baking step, then cover and refrigerate for up to 24 hours before baking.
Can I freeze the unbaked rollups?
Yes, assemble the rollups and freeze them raw. Bake from frozen, adding 5-7 extra minutes to the baking time.
What’s the best cheese to use for Garlic Butter Bacon Cheeseburger Rollups?
Cheddar is classic, but you can mix in mozzarella, pepper jack, or gouda for different flavor profiles.
Can I omit the pickles?
Of course! If you’re not a fan of pickles, simply leave them out or replace them with sautéed onions or roasted peppers.
How do I make them vegetarian?
Swap the ground beef and bacon for seasoned plant-based crumbles and vegan bacon strips, and use vegan cheese.